
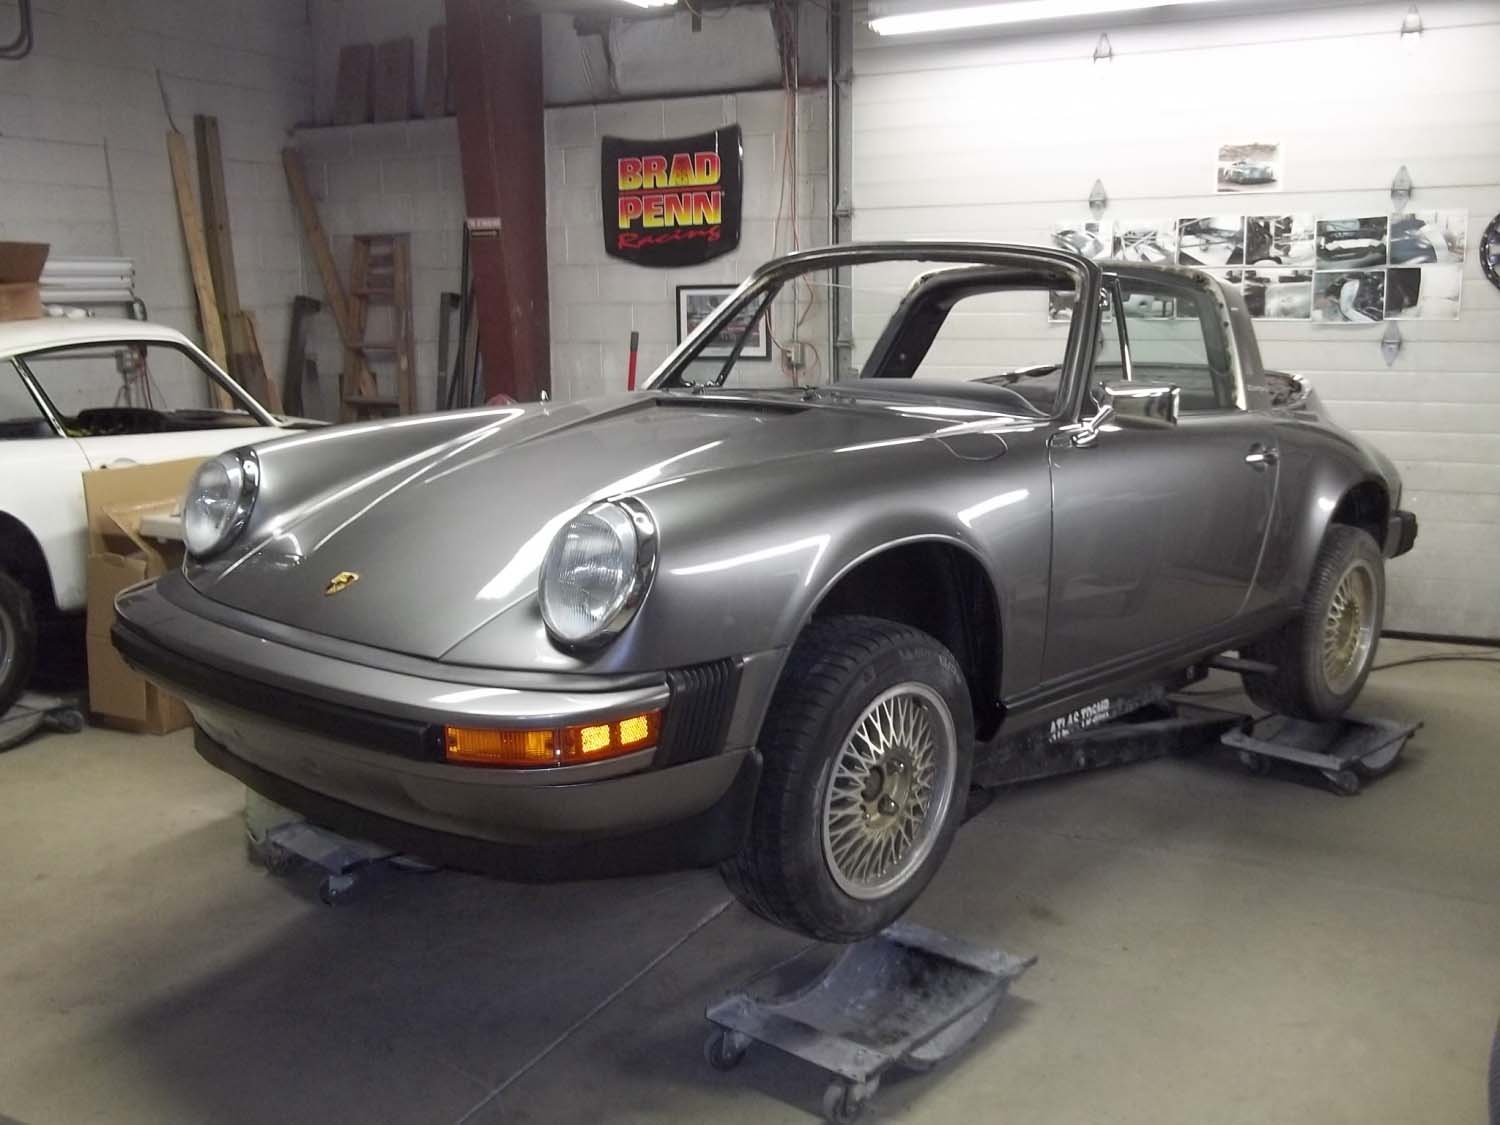
This Targa has been is the same family since the 80’s. The body was stripped and the interior gutted as it was brought back to life. It was done to look the same as when the owner was just a kid and couldn’t wait to drive it.
(Click on any image below to view larger size.)
-

- A typical rust spot at the targa bar mounting area. This had been previously repaired so a larger sectione was cut out and properly butt welded in.

-
- This section had been largely rusted away. But using what was left here and referencing the other side, a new piece was made.

-
- After a coat of paint, it will look like new.

-
- This flare was both sticking out at the lap joint but also tapering down from the original body line.

-
- After cutting, reshaping and some fabrication, it now looks correct.

-
- This is how the extension fit when the car arrived.

-
- It was short and did not extend out to the edge of the flare.

-
- Again, after more fabrication, we have a great fit.

-
- It looks good from both directions.

-
- A rusty section with a few pin holes is cut out and repaired.

-
- The new piece tacked in place. It will be finished and painted to look like new.

-
- This is the drivers side dash area. Water had gotten under the dash pad and worked its magic for some time.

-
- This is the “A” pillar in the same area.

-
- Fabricating several pieces to make the repair, it is as good as new. The lip for the windshield seal has also been replaced. It is the curved piece about 7″ long.

-
- Rust damage on the passenger side “A” pillar. What looks like metal pushed out is really factory lead to finish the seam.

-
- Slightly sanded before we knew it was lead.

-
- After the lead was removed, the damaged section was cut out.

-
- A patch is made before treating the metal behind it.

-
- A mint condition fender was found that had been chemically stripped and E-coated.

-
- The patch is completely welded in and ground smooth.

-
- Another view of the repair. After finishing and paint, it will look like new.

-
- The finished channel for the trunk seal.

-
- With the rest of the repair panels in place, the body is reassembled and checked for proper alignment. Numerous adjustments and checks are made throughout the process.

-
- Every panel affects the overall fit. That is why even the filler pieces behind the bumper must be in place. The bumper bellows were put in place as well. Any bodywork needed can now be done.

-
- Cutting out the rust in the battery box showed a very solid structure remained all around it. The metal below is cleaned, chemically treated and painted.

-
- Panels were made with the same contours to replace the rusted sections. The threaded holes were checked, showing one needed replacement.

-
- In reassembling the body, the door is adjusted to fit the body first.

-
- Next, we check how the front fender lines up with the door. Next is the trunk hood and so on.

-
- When the H4’s came in, they were fit to the fender right away. There can be issues and you never want to find them after finish paint.

-
- The headlight bucket is masked off to avoid excess paint buildup on the outside ring that the light must fit over.

-
- The last remaining area on the dash is complete.

-
- While paint is drying, repairs to the speaker holes are done.

-
- Both doors needed the same type of repair.

-
- The floor and dash are masked off. The floor is sanded and repaired. Then chemically treated.

-
- While the primer is drying, other parts are disassembled, blasted and painted. With a rebuild kit, this pedal cluster is ready to go.

-
- Epoxy primer and satin black paint is next.

-
- It’s ready for speakers to be fit.

-
- After repairs in the trunk, it is undercoated and painted body color.

-
- The engine bay gets a coat of body color as well. The wiring harness is then cleaned up and put back in place.

-
- The front fenders are undercoated before paint.

-
- This is the body color before clear.

-
- The base coat needed to be sanded before a finish coat could be sprayed.

-
- The finish coat laid down nice and smooth. It is a great color.

-
- Here the body has been masked and final preparations are being done before undercoating.

-
- While paint is drying, the freshly chromed handles are hand fit, re-keyed and reassembled.

-
- Wurth undercoating is used throughout.

-
- The suspension pieces will be done in the mechanical phase.

-
- The suspension pieces will be done in the mechanical phase.

-
- Here the entire body is color sanded and left to dry for several more weeks.

-
- The first round of parts for assembly are laid out.

-
- The interior detail on the door is done while we wait for assembly to begin.

-
- Countless parts of all sizes are prepared for the assembly process.

-
- This is going to look great. It is a great color.

-
- The rear is nearly complete.

-
- The lower panel fits great with the custom flare.

-
- The rocker boxes are sprayed with an interior body wax.

-
- One of the last things to go in is the fuel tank.

-
- New Perlon carpet trims the trunk out nicely.

-
- Dynamat is used to replace the factory tar like sheets.

-
- The body is done at this point.

-
- The interior will go in next.

-
- We used some of the original vinyl because it was in good shape.

-
- After the carpet on the sill is installed, the seats and floor mats will go in.

-
- Looking at the trunk lid, the peeling paint shows what hot Kentucky sunshine can do to your paint.


-
- Upon initial inspection, the floors are in good shape.

-
- The bottom structure of the gas tank support is gone but the top looks great.

-
- This is the bottom side of the pedal cluster area. It will be replace by sectioning a part from a new floor pan.

-
- With a little work, the seats look pretty good. Getting the smell out of them is the real task.

-
- The rear panel and seat backs can be used as is.

-
- This is the inside of the rear quarter panel where a flare was added. You can see a vertical crack in the undercoating. There is an extra layer of metal in the wheel well that will be cut away to address this crack and anything else that may be there.

-
- The current fit between the quarter panel and lower extension.

-
- With the body panels removed, detail cleaning and prep for power washing is done.

-
- With the body panels removed, detail cleaning and prep for power washing is done.

-
- A repair panel is made to close a hole where A/C components once were.

-
- Hand stripping the rear quarters.

-
- After power washing reveals a nice solid car underneath. (Next three pictures)


-
- This is a better picture of the inside of the rear flares.

-
- This is what it should look like.

-
- The front pan has been replaced.

-
- This is the channel for the trunk seal being removed.

-
- The rusted out section has been removed.

-
- The new panel is fit and tacked in place.

-
- The rusted out joining panel for the front fender is removed.

1946 Chevy 1/2 Ton Truck
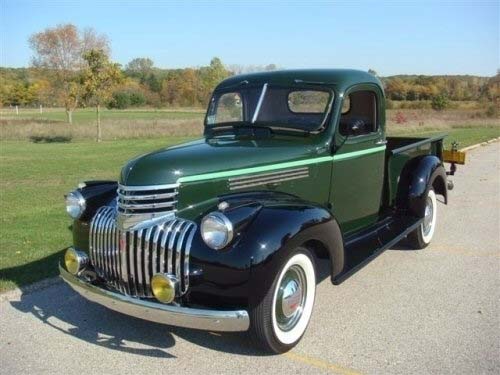
This truck has been in the same family since the 1960’s. Tim, the current owner and restorer, got the truck from his uncle back in 2001. Tim’s father originally bought the truck used in the mid 60’s and kept it through the late 60’s. That’s when his uncle bought it and “upgraded” it to the newer 1947 Advanced Design. At some point it got some more advanced designing in the form of chicken wire and bondo along with a new wood bed. Eventually it found its way into an old dairy barn in the early 1980’s when a master cylinder went out. It stayed there until 2001 when Tim got it.
What you see here is years of dedication moving this around along with his family during career moves. I had the good fortune to meet Tim before he left and he contacted me upon his return to Wisconsin. I have included pictures that go outside of the scope of what I worked on to show what a beautiful piece of work it really is. It has been in Vintage Truck magazine and was the cover truck in VCCA G&D magazine. It has received numerous awards from all levels of shows from local shows to Concours level events. In 2013 it received a gold award from VCCA after being judged for the first time in a sanctioned VCCA meet. I invite you to go to www.46chevytruck.com to see the whole story.
Congratulations Tim on a job very well done.
(Click on any image below to view larger size.)
-
- One of its first outings. Notice there is no red lettering on the front grill. Always a work in progress.

-
- A replacement box was needed as the originals rarely survived. These were farm trucks. Work horses. Rear fenders had an even lower survival rate.

-
- Even new pieces can have flaws that need a little body work.

-
- The rear fenders have a subtle body line down the back. This one was pretty beat up. After hours of hammer and dollie work, the body line is back and needed just a little body work to complete it.

-
- Several pairs of running boards were bought to find the best pair to work with.

-
- I made a special applicator and sanding block to speed up the process.

-
- Most of the front panels were fairly straight requiring a minimal amount of filler work.


-
- After chroming, the grill was completely masked off for detail painting.

-
- All hand cut masking was done. Then it was lightly blasted to etch the chrome for paint.

-
- A little airbrush work and we’re done. Quality is in the details.

-
- The painting process starts with the apple green belt line first.

-
- Mask and shoot.

-
- After the Brewster green, unmask and clear coat.


-
- A front fender gets its shine back.

-
- Sanded after paint for an even flatter finish after polishing.

-
- The rest of the pictures are as it was shown at the Milwaukee Masterpiece.


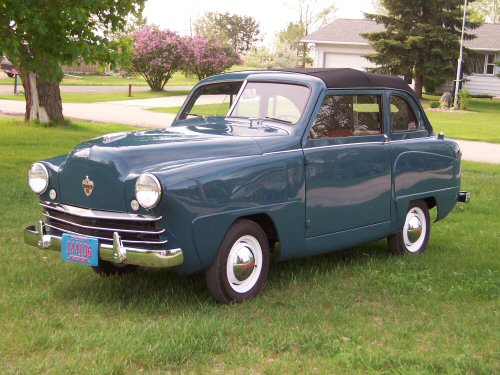
1949 Crosley Convertible
(Click on any image below to view larger size.)
-
- The body on this car was very solid. A little straightening and that was about it.


-
- Overall a very spartan interior.

-
- This dash design is actually a sticker.

-
- This is the only area needing work. Some one cut a section out. Fortunately we had a doner car to get a replacement piece.


-
- I literally rolled the car over to paint the bottom.

-
- A bevel gear setup drives the camshaft.

-
- The finished product.

-
- This is a car that you do not really want to go over about 35 mph. Top speed is only about 45mph.


-
- It is a very simple car.


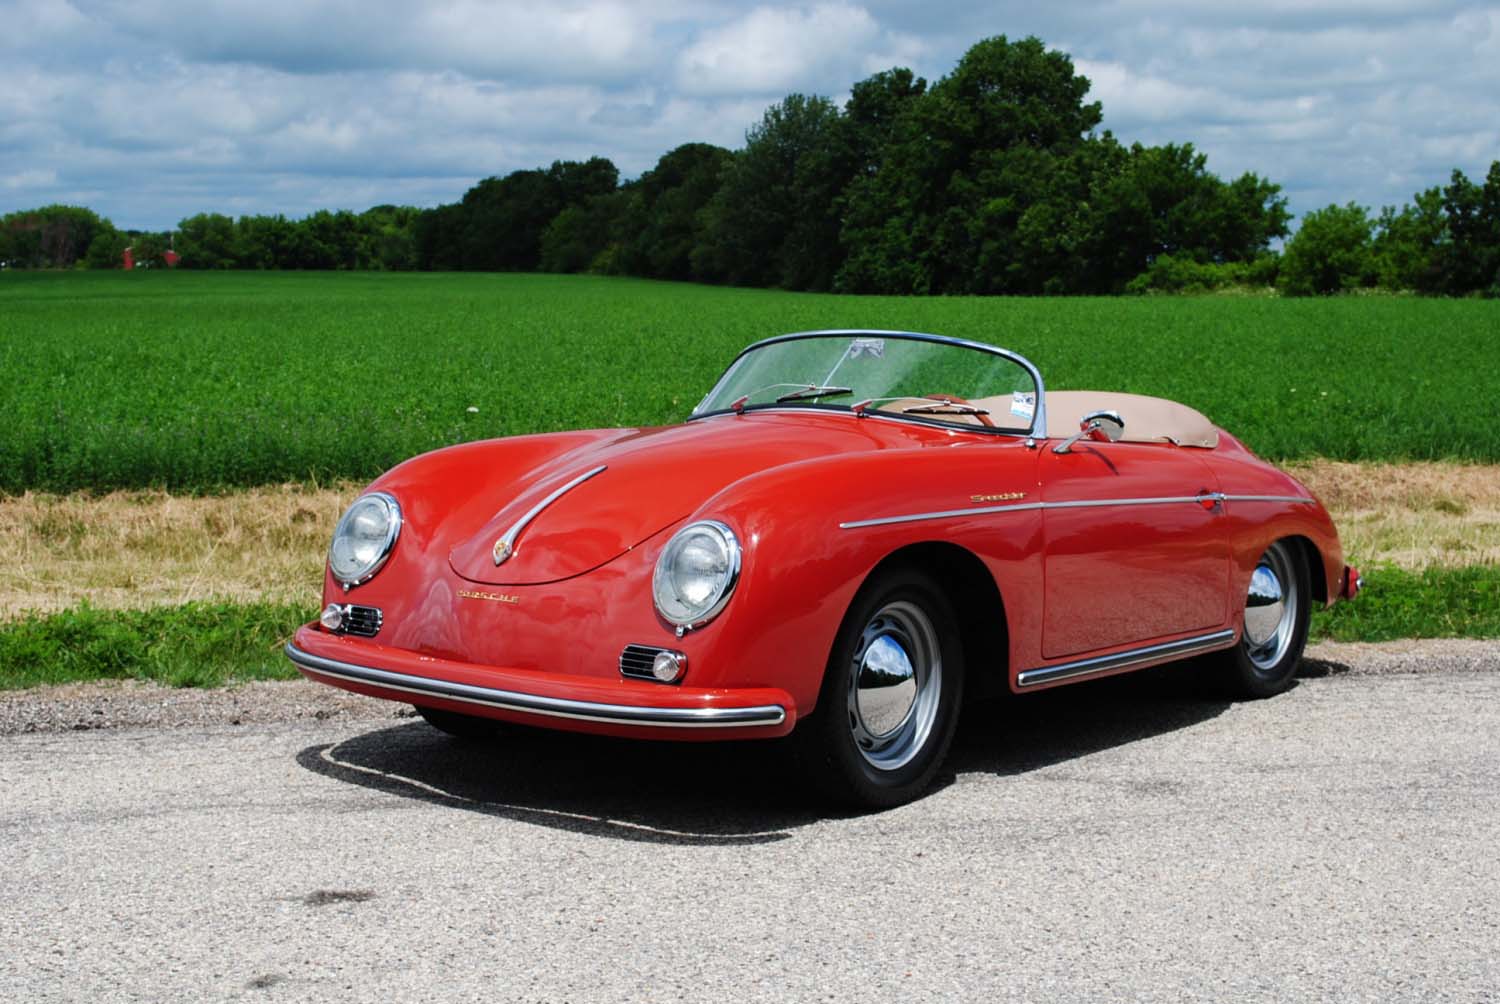
1965 Porsche 356 Cabriolet
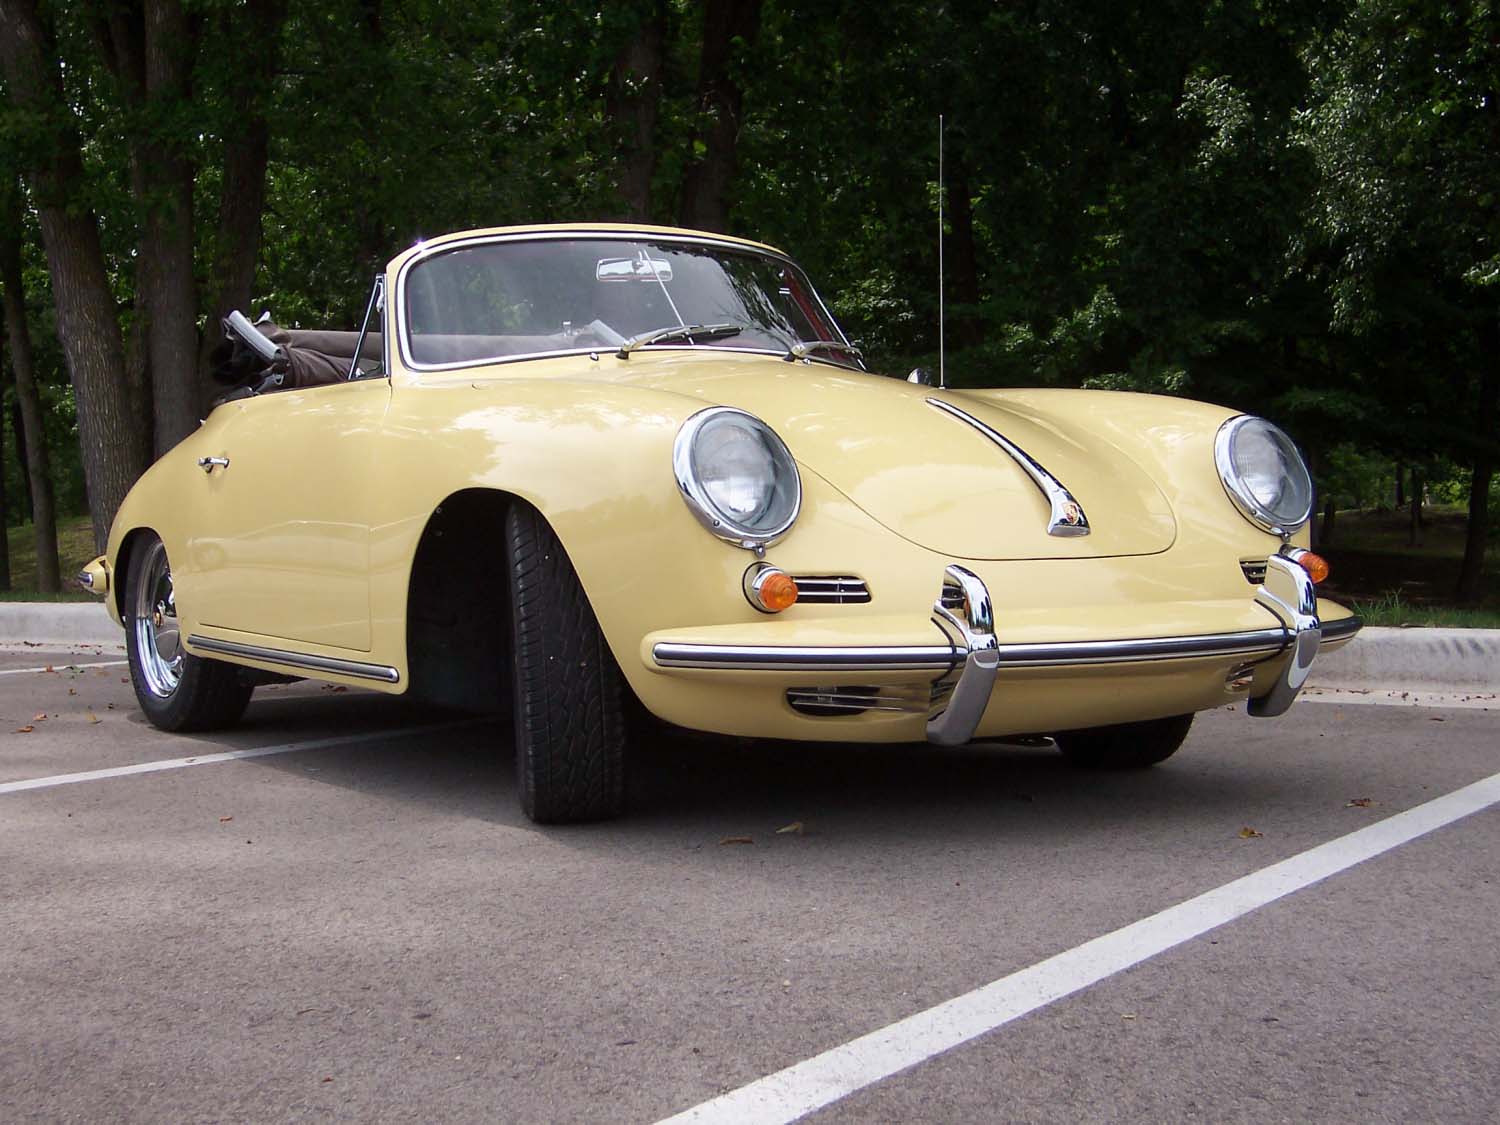
This car came in to get a fresh paint job and some interior work. As it turned out, it also needed a clutch. As always, the paint was to be stripped off completely to see what we really have. It was an eye opener.
(Click on any image below to view larger size.)
-
- There was an incredible amount of body filler on this car. It was very even throughout. Even the door jams were completely covered.

-
- As you can see, there was roughly 1/4 inch of filler everywhere. Removing it made the car much lighter.

-
- Panel gaps and a true body line are always a must.


-
- Replacing the door jams due to rust makes it easier to get the gaps correct.

-
- Rusty heater tubes are removed.

-
- New tubes made of heavier material are use and welded in stronger to provide additional strength.

-
- Old longitudinal was not even attached at the top. Structural integrity is now restored.

-
- Fitting to get the correct fit.


-
- A nice straight series of body panels.


-
- Epoxy primer followed by a high build primer to fill minor surface deviations.


-
- Beautiful basecoat/clearcoat applied.

-
- Fresh undercoating applied throughout.


-
- Rear bumper details. Just as pretty on the inside as it is outside.


-
- All gages fully rebuilt.


-
- Every detail is done. Re-chromed original handles, to fresh tags on the hinge post covers.


1955 Chevy Bel Air
This car was purchased with the original paint still on it. It was planned from the beginning to be a hot rod. Pictures do not do justice to the color combination.
(Click on any image below to view larger size.)
-
- After the owner stripped it down, we took it off of the frame to mount it on the rotisserie.

-
- It is so much easier to reach every part of the body this way. Well worth the time to mount it.

-
- The headlight eyebrow always has a tendency to rust out.

-
- Once the repair panel is in, just light finishing id needed.

-
- We were fortunate to have an extra engine hood. I used sections from it to repair the original one.

-
- With the corner bracket in place it is ready to go.

-
- The topside finished.

-
- The cavity inside was holding a lot of debris.

-
- The panels underneath will be coated prior to welding the repair panel in place.

-
- Due to the length of this repair on such a straight section of the body, I used a lap joint to keep the panel straight. This is rare to do this. Inside I completely sealed the seam to protect it.

-
- The finished panel.

-
- Here the wheel well is cut away to make a mini tub.

-
- The original wheel well is moved over and the trunk hinge is reattached for support.

-
- Here the rear sill is prepped for replacement.

-
- The inner support goes in first.

-
- The outer threshold is now in place. Careful measurements were made before any cutting was done. The next pictures illustrate why.

-
- This picture is from a different ’55 Chevy project. Some one replaced the rear sill but never fit the trunk lid during the process. It was literally 1/2″ too low.

-
- 1/8″ rods were welded in place and then ground to fit. The only evidence of the repair is on the inside of the trunk lid were it visually gets wider than what would be considered normal.

-
- The bottom was sand blasted and looks very good. The supports were getting a little thin so sections were grafted in.

-
- Here the dashboard gets the same treatment as the body. Guide coated and block sanded for a nice straight panel.

-
- The center gets painted a tri-coat Diamond White Pearl.

-
- With the center protected, the rest gets House of Kolor Tangelo Pearl.

-
- Clear coated and ready to be masked as the rest of the body gets done.

-
- First the top.

-
- The top is then masked as the rest gets some Tangelo Pearl. The trunk is masked in such a way to avoid additional dust and to save on paint and clear.

-
- After paint the body is masked in preparation for undercoating.

-
- Another time the rotisserie is handy to have.

-
- The finished body back on its frame ready to head home for final assembly.

1969 396 SS Camaro
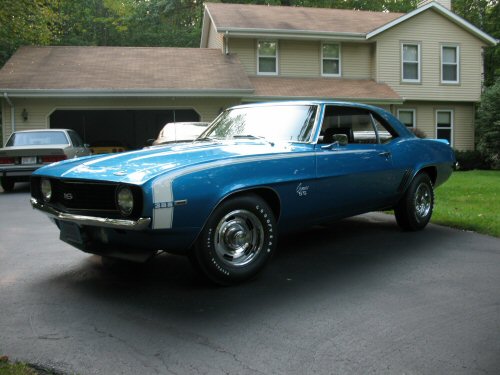
This is a numbers matching car. Every piece that could be restored was used. Where minor pitting had occurred on things like brackets, they were cleaned and repainted. Pitts were not filled to show the true condition of each piece. All factory markings and tags have been restored. The owner did a great job on all of the details. My job was to give him a beautiful, straight body to build around. Just another great project to be part of.
(Click on any image below to view larger size.)


1970 Chevy Chevelle SS
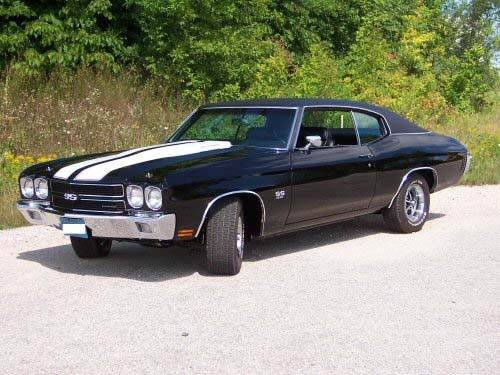
The owner has owned this car since it was just a year or two old. He did all of the work himself except of course, the body and paint. He even installed a new floor and sand blasted it underneath before I got it. Every nut and bolt was replaced or replated. It has been restored to completely stock. It is a beautiful car inside and out. My favorite part- it has a four speed.
(Click on any image below to view larger size.)
-
- Here is the car the way it started. It was in for some preliminary work on the front fenders.

-
- By doing the work on the fenders before it is completely disassembled, we insure a perfect body fit at final assembly.

-
- Overall it looks pretty solid.

-
- By the time it is media blasted, the repair areas have grown in size.

-
- It is not surprising to see that each section behind the rear wheel needs a larger repair.

-
- It was cheaper to buy a large quarter panel section and cut it to suit than to make the repair panel from scratch.

-
- This small repair was made by hand.

-
- This is the lower section of a front fender. Both sides were the same.

-
- The structure behind the body skin needed repair as well.

-
- The patch is made and a coat of epoxy applied.

-
- Top coat black is applied next before the outer surface is welded in place. There is no way to coat this area afterwards.

-
- Patch panel is fit in place, waiting for final prep and welding.

-
- A section of the front fender had to be sourced to repair a previous alteration on the inner fender.

-
- The hood looks perfect after media blasting.

-
- With a little blocking, numerous lows spots were found. This is not uncommon in long panels like this.

-
- Before stripping, a drawing was made to exactly duplicate the stripes as they were from the factory.

-
- Reference tape gets laid out first.

-
- Blue fine line tape is used to mask the paint lines. It leaves a perfect edge on the paint.

-
- The layout is complete. It may not look like much, but every dimension including the radius in the corners and over the cowl induction are right on.

-
- Mask the center and we are ready for paint.

-
- Painted, unmasked and cleared.

-
- The completed car.


-
- Every nut and bolt is like new.

1956 Porsche 356A Coupe
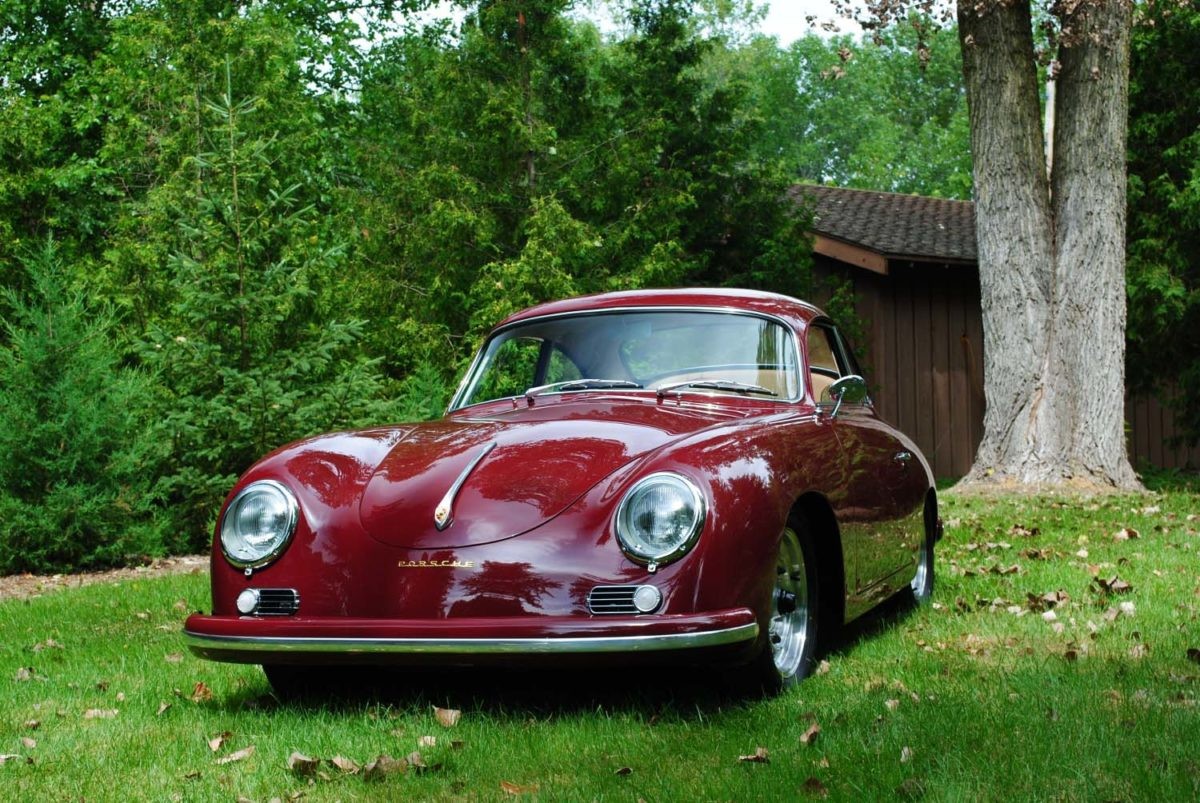
This car is the result of a great collaborative effort between Tom the car owner, Fat Performance, Vic Skirmants, Chris Coddington, Autobahn Interiors and myself. It went very smooth with having everyone on board to go the extra mile as needed. This car was purchased with the intent on making a generally stock appearing car with numerous upgrades and custom touches. Nothing was done to it that cannot go back to absolutely stock condition. The original engine and transmission are still with the car in storage. The color is a 1956 only color, Polyantha Red. I found a section in the interior in perfect condition and got an exact match. OEM or exact reproductions were used wherever possible for the upgrades. All stock parts were restored and refinished as possible opposed to reproductions that are cheaper but do not look as nice or are incorrect.
Tom did a great job of sourcing parts so I could keep doing what I really enjoy. Making beautiful cars.
(Click on any image below to view larger size.)
-
- This is the car as purchased. Note how the front nose currently looks.


-
- The complete body was sent out for chemical stripping

-
- The door openings were really pretty good.

-
- The lighter color you see here is the factory lead used to make a perfect door gap.

-
- It is not uncommon to find a large area of damage under the paint. Almost every car goes through a point where a previous owner does not want to fix it properly.

-
- Fortunately body sections are readily available.

-
- Here the new section is being fit to the engine hood.

-
- This picture and the next few show just how well this repair panel fit. This is the bottom edge on the drivers side.

-
- The passenger side fits the same.

-
- Only a little hammer work is needed to make a perfect gap.

-
- Not a bad start.

-
- The radio opening had been enlarged for a more modern stereo at some point.


-
- The gas tank floor had its share of pinholes.

-
- A new floor was installed and the gas tank fit was checked.

-
- The longitudinals are rebuilt in preparation for the new floor to go in.


-
- Now that the floors are in, the seat mounts can be done.

-
- The smallest area of damage is repaired.

-
- Without this fix, the carpeting will not lay correctly. Quality is in the details.

-
- Here is a random dent in the top of the front fender. It is recommended to let the body man hammer these out instead of trying it yourself.

-
- This dent needed a hammering process that involved working down the side of the fender to get it right. There is a method to the madness.

-
- This is what the nose really looks like after stripping. It looks like they tried to put a “C” nose on an “A” car.

-
- The bad section removed.

-
- I had just the right sized piece of an “A” nose available to me.


-
- After the metal work was done, it was sent back to the stripper for a cleaning and e-coating.

-
- The hard baked on finish is the perfect protection throughout the body. Everything was done. Doors, lids and bumpers.

-
- The cost is offset by the fact that everything needs to be coated. The e-coat is perfect because this is how it is supposed to look in areas like under the dash.

-
- The replacement Speedster seat shells arrived. Time to get in the drivers seat. The hinge reinforcements I use can be seen in the orange 1958 Speedster gallery.

-
- This is the start of the oil cooler mount for our 2256cc engine.

-
- Made from heavy gauge steel mounted with rubber isolator mounts.

-
- Oil cooler mocked up.

-
- Carrera oil cooler screen fit perfect in the stock mounting holes.

-
- GT bumper strips custom fit.

-
- Even the ends are polished. Quality is in the details.

-
- Primed, blocked, remasked and ready for paint.

-
- Color and clear.

-
- After paint, the body is sanded down completely.

-
- The exterior is completely masked off for undercoating.

-
- Areas like the trunk get a top coat of semi gloss black to give it just the right look.


-
- Here the car is ready for the three step polishing process.

-
- Like a mirror.

-
- The assembly process begins.

-
- Pedal cluster blasted, repainted and rebuilt.

-
- Tucked away is a 911 reservoir to feed the new dual circuit master cylinder. There is just enough room in there if you want to use a power bleeder. My preferred method.

-
- CSP supplied this brake system direct from Germany. It provides disc brakes while allowing you to use the stock wide 5 bolt pattern.

-
- Front spindles were replaced with the larger “B” spindles for more strength.

-
- First a layer of heat and vibration protection.

-
- Then a second layer of sound deadener. This all helped to create nice smooth contours for the carpet as well.

-
- The interior takes shape.


-
- Beautiful seats and upholstery work done by Autobahn Interiors and shipped to West Bend.

-
- To keep the front carpet clean, it will not go in until the car is ready for delivery.

-
- The motor is from Fat Performance. Based on a 914 motor, it is 2256cc with dual Weber 44 IDF’s and a 911 fan to keep it all cool. Combined with the oil cooler, this thing runs cool no matter what the weather and traffic conditions are.

-
- An engine surround was needed to keep the engine clean and provide a very tidy appearance.

-
- Repeated fitting and trimming

-
- The stock 914 pulley guard was the only piece of the stock engine tin to be used.

-
- Painted and trimmed in rubber, it is ready to go in.

-
- It fits in very well.

-
- The exhaust is an equal length configuration that fit with very little modifications required.

-
- Perfectly restored gauges with the combo gauge altered to provide oil pressure readings as well.

-
- Time to enjoy.

-
- The wheels are 2 pc with forged aluminum alloy centers custom made to our offset requirements by Chris Coddington. Lightweight and strong.

1956 Porsche Speedster

(Click on any image below to view larger size.)
-
- This is a 1956 Porsche Speedster owned by the same person since he raced it in the late 60’s, early 70’s.

-
- He stripped the car completely, had it chemically stripped of paint and e-coated before it came to me.

-
- The semi-gloss black makes it very clear as to the straightness of the body.

-
- There was quite a bit to be done.

-
- As you can see, there was no floor and both longitudinals were gone.

-
- A number of braces were required to make it stable enough to put it on a rotisserie.


-
- The next few pictures show the longitudinals being rebuilt.


-
- Here the lower edge of the front bulkhead is replaced. The floor then attaches to it.

-
- The next several pictures show how a damaged area is replaced.


-
- All body patches are butt welded together.

-
- They are then hammer and dollied into final shape as needed.


-
- Here is a prime example of how well some replacement parts fit when received. Most fit better but virtually all of them need fitting.


-
- The metal work is coming along.

-
- A nice straight body line all the way down.

-
- While the door fit is very good, there is still hand work that needs to be done on the rear quarter.


-
- This repair will take a bit more work. The headlight bucket must fit in tight and even.

-
- First the round contour is created and fit. Some of the old metal is still there for reference.

-
- The rest of the damaged metal is removed and a new piece is made.

-
- The next several pictures show how each piece must be made to fit. Tacked in place until they are all ready for complete welding.


-
- The passenger side door was not original. That meant the door opening had to be made to fit the door.


-
- They were made by hand when new. To get the same caliber of fit, they have to be hand made again.


-
- Everything must be test fit before any body and paint work can begin.


-
- Here the side Speedster spear holes are laid out.


-
- Most people will not show any body filler being used. These pictures show how little is actually used when the panels are done.


-
- Again, a minimum of filler is used to round out the contour.

-
- Epoxy and high build primer are used to fill small imperfections that will be removed during block sanding.

-
- A guide coat is applied to show the hi and low spots as the body is being blocked. This is where the body becomes very straight.

-
- A rare 80 liter gas tank is fitted.

-
- Body lines are checked again during the blocking stage.


-
- Finish details.


-
- The body in a base/clearcoat system.


-
- The body is masked off for undercoating.


-
- The clearcoat has been completely sanded down before polishing.

-
- The wheel wells are masked to keep them clean while polishing.

-
- It is ready to go back to the customer.


1958 Porsche Speedster
(Click on any image below to view larger size.)
-
- This 1958 Speedster came to me after sitting disassembled in another shop for 17 years. Less than 18 months later is was being driven regularly.

-
- This is just one of the usual places Speedsters are prone to rust.

-
- Without too much work it is good as new.

-
- Of course the opposite side of the dash was rusty too.


-
- Three areas of the frame were the only bad parts of the replacement trunk lid. It was not kinked and very straight.

-
- A scrap hood donated the frame sections needed to do the repair.


-
- The trunk lid hinges were torn out due to a previous unsatisfactory repair where the secondary trunk catch was not installed.

-
- Here is some poor damage repair from an earlier incident.

-
- The trunk lid and hinges are fit with the old nose section intact for fitting purposes.

-
- Nose and battery box removed awaiting new sheet metal.

-
- On the rotisserie, a new floor and longitudinals are installed.

-
- Painted in epoxy and topcoat black. It will be undercoated later in the process.

-
- The new nose being fitted.

-
- Beautiful body line fit.


-
- Nose complete with headlight buckets.

-
- The car now has the suspension on and weighted for door to body panel fitting. This puts stress on it to simulate how it will be when assembled.

-
- The process of panel fitting.


-
- While stressed, the windshield and top are fit. Replacement glass had to be ground and reshaped to fit the car with no stresses in it.

-
- Original Speedster seats with all the normal stresses and cracks.


-
- One of the stiffeners used to repair the seat shells for the long term.

-
- Two coats of epoxy primer.

-
- High build primer to fill tiny voids and scratches.

-
- Body guide coated to aid in block sanding.

-
- Special order orange applied. Only 28 Speedsters came with this color.

-
- Body masked for undercoating.

-
- The assembly process begins after sanding and polishing.


-
- Everything is returned to as new.


-
- A Skirmants built transmission.

-
- Long block from Competition Engineering.

-
- Ready to go in.


-
- Ready to be enjoyed!

